To create a New Field in a Contact List in Which50, click + Add Field. In the Widget on the rightside, you can Name your Field, and choose what Type of Field it will be. You can also choose whether the Field will Show in Personalisation or will Show in Segmentation.
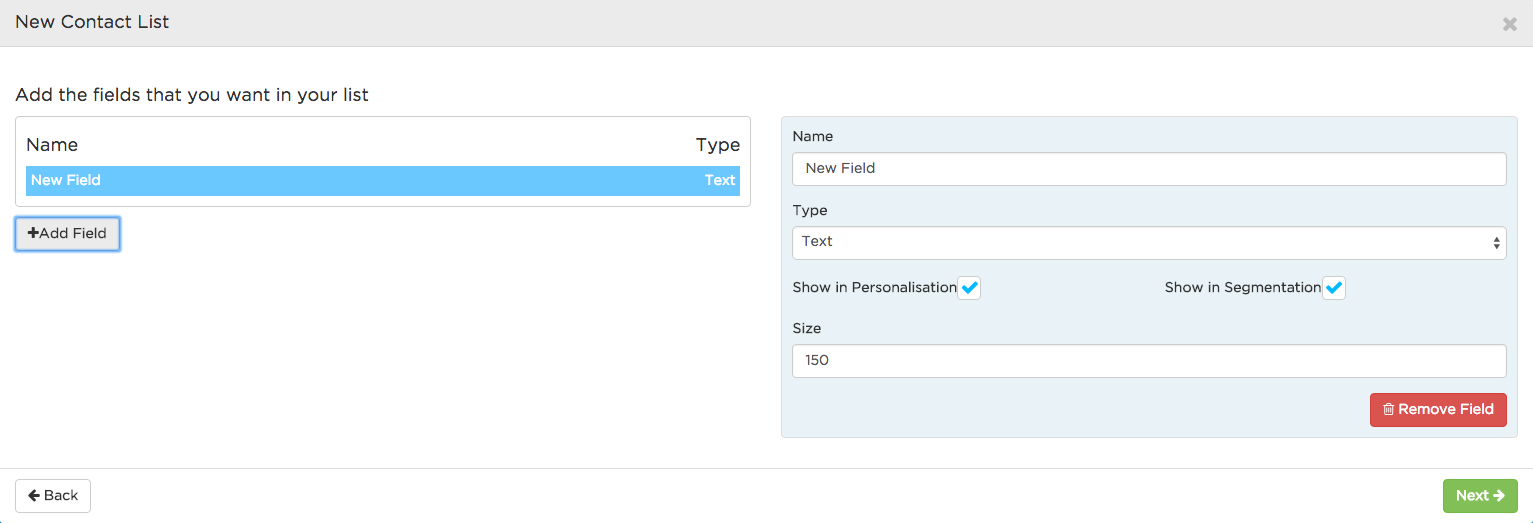
Selecting Show in Personalisation allows you to select this Field as a Personalisation option when you are creating a Journey in Which50. If the Field you are creating is First Name for example, selecting Show in Personalisation will allow you insert your Contact’s First Name into any Journeys you intend to create using this Contact List.
Selecting Show in Segmentation means the Field will be a selectable Segmentation condition. You can learn more about Segmentation here.
Give your Field a clear, easily identifiable Name. You can select what Type of Field it will be from the Type dropdown menu. If your Field is a First Name Field, choose First Name from the dropdown, if it is a Mobile Number Field choose Mobile etc.
Important: If the Field will be used to contain a list of selectable options, ensure that its Type is a Fixed Field. You can now add what those selectable options will be, for example yes, no, I agree, I disagree etc., by entering the first option in the empty Values Field and then clicking + to add another value. If you intend to have multiple selectable options within the Field, an easier approach is to click the Edit as Text icon below the Values field. You can now type or copy & paste in all the different options you need, one below the other. This is particularly useful if you are asking clients to select their local branch from a couple of hundred options for example. If you have the full list saved as a text file you can simply copy and paste it into the Edit as Text box.
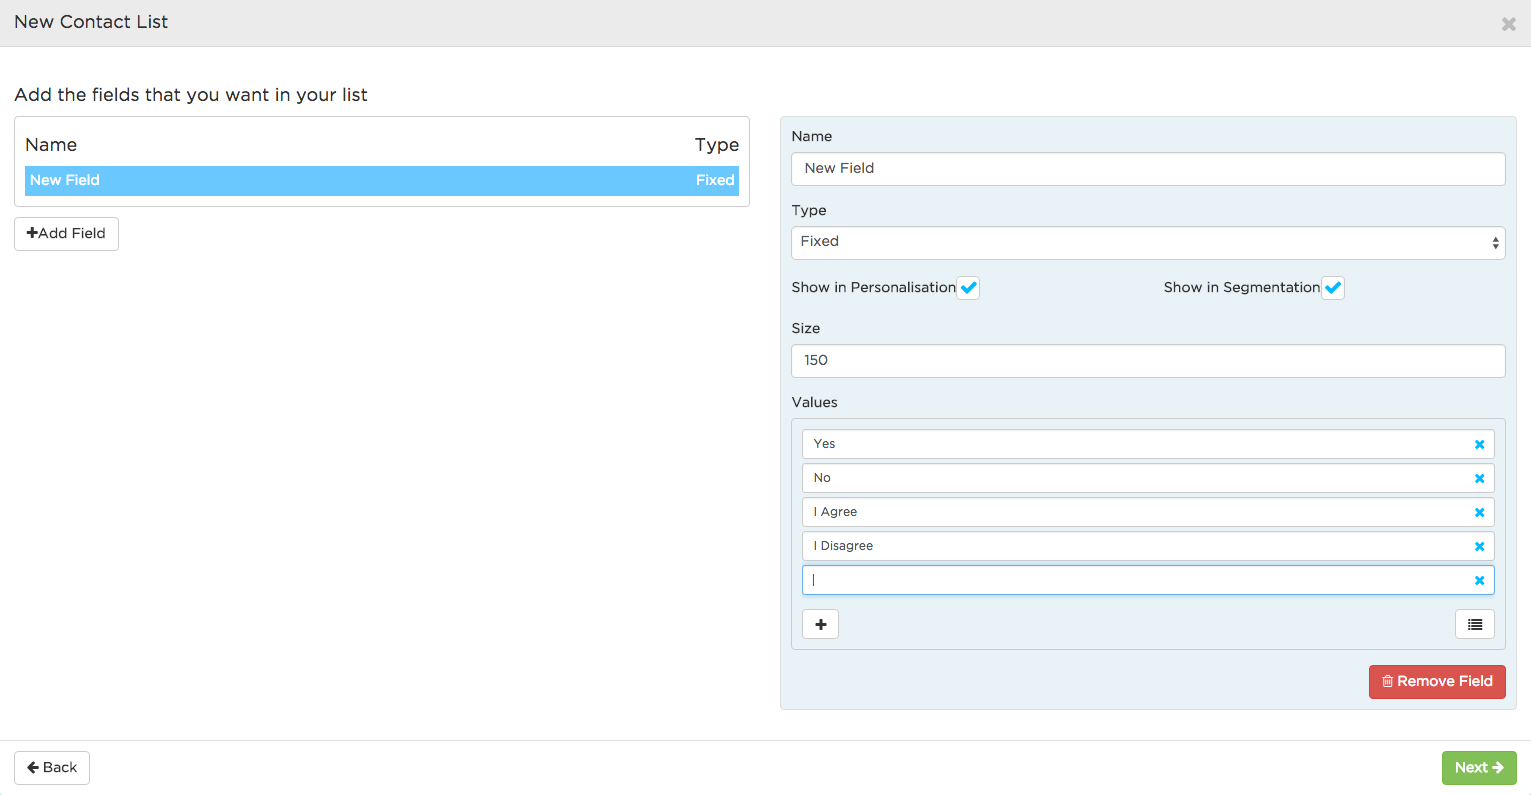
If you want more than one option to be selectable simultaneously, make the Field Type a Multi-Choice Field.
Finally, Size specifies how many characters the Field can contain. When you have created all the Fields you need, remember to click Save.
Comments